Re-posted in 2011, with updates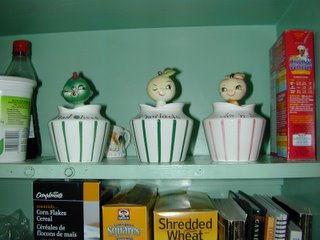
Our friend the DHM at
The Common Room started a
Meme for Monday. In other words, a quiz game to play and pass on, in this case about our kitchens and cooking habits.
1. How many meals does most of your family eat at home each week? How many are in your family?
Two adults, one teenager, two younger children. We eat most meals at home, maybe eat out once a month. Mr. Fixit sometimes stays at work over lunch and goes out for a burger.
2. How many cookbooks do you own?
I thought I had quite a few, but definitely not as many as the DHM's guess of 300. Maybe 40? I have some doubles for the girls (for when they're out on their own someday).
3. How often do you refer to a cookbook each week?
Including my binder of printouts and clippings? Probably several times a week.
4. Do you collect recipes from other sources?
The Internet is one of my favourite sources as well, particularly recipes from friends' blogs. I also think the recipes from Canadian Living turn out pretty well. As Mama Lion said in
her responses, the Internet has definitely changed my cookbook-buying habits and also my clipping-and-saving habits. Reading the
Hillbilly Housewife's site alone has been the equivalent of a new cookbook.
5. How do you store recipes?
The ones I like go into a binder. Clippings I'm just thinking about go in an accordion file.
6. Do you follow recipes pretty closely, or use them primarily to give you ideas?
Depends on what it is. I've read so many recipes for things like lentil soup that by now I just notice "oh, they put in oregano and carrots, maybe I'll try that." But some recipes work so well just the way they're written that I don't want to change them. I like recipes that give you variations and suggestions for substitutions, because I don't always have whatever-it-is on hand.
7. Is there a particular ethnic style or flavor that predominates in your cooking?
How about this: Post-vegetarian/tightwad/comfort food with a few shots of Mennonite and Schwabian. (Mr. Fixit's family cooked in an Eastern European style that combined German, Hungarian and Croatian cooking influences.)
8. What's your favourite kitchen task related to meal planning and preparation?
Taking something out of the oven that smells good. And maybe puttering around before supper time, getting everything on the table.
9. What's your least favourite part?
Peeling things.
10. Do you plan menus before you shop?
I usually have several meals in mind but I don't always know when we're going to have them.
11. What are your favourite kitchen tools or appliances?
Crockpot, toaster oven, timer. And Mr. Fixit's power grinder that sharpens knives, but that's in the garage.
12. If you could buy one new thing for your kitchen, money no object and space not an issue, what would you most like to have?
A gas stove and new curtains.
13. Since money and space probably are objects, what are you most likely to buy next?
A blender, if I can find one at a yard sale. (I want to make
milkshakes.)
14. Do you have a separate freezer for storage?
Yes, we just got one.
15. Grocery shop alone or with others?
We all go together on Saturdays, and then Mr. Fixit goes to the butcher's when he's at that end of town.
16. How many meatless main dish meals do you fix in a week?
It depends on the week. Usually a couple of nights a week, and then I guess you could count "meatless leftovers" the next day!
17. If you have a decorating theme in your kitchen, what is it? Favourite kitchen colours? (And yes, I spell Canadian; doing it the other way is like walking backwards for me.)
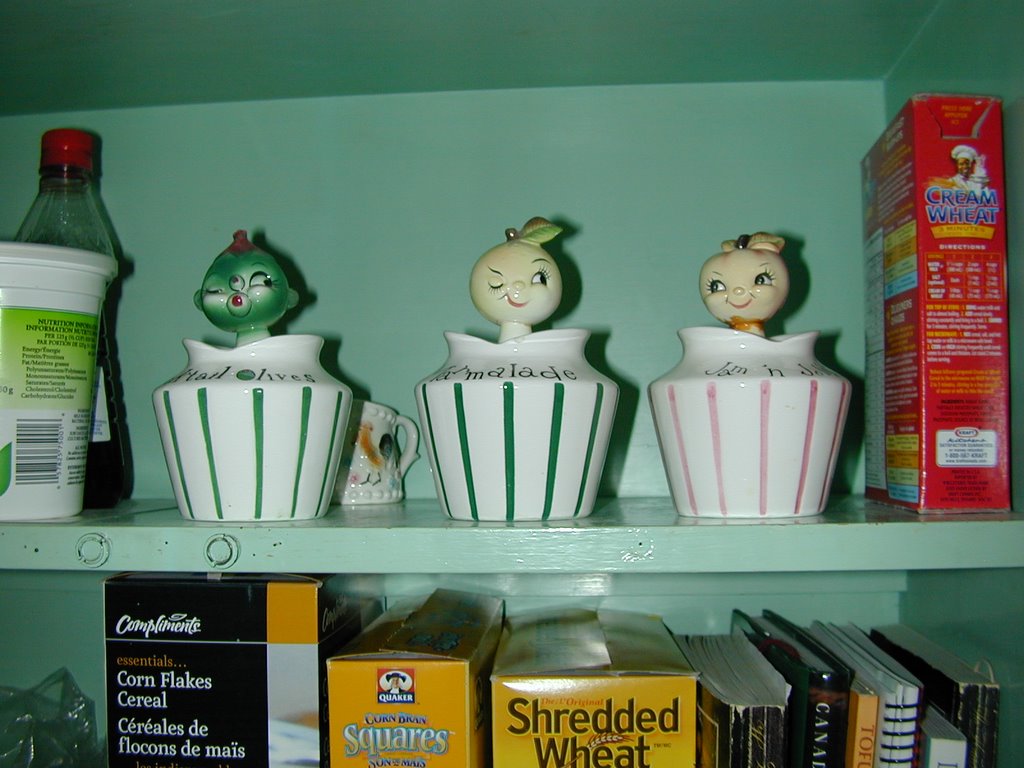
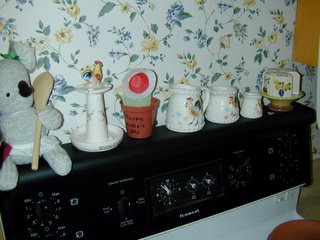
A theme? "Homeschool Contemporary." Blue and yellow flowered wallpaper. I have a few vintage china things out that I like, roosters and funny-face jam jars.
18. What's the first thing you ever learned to cook, and how old were you?
My mother let me put bacon on the Kraft Pizza Mix when I was about three...
19. How did you learn to cook?
Brownie Cooking Badge when I was nine?
"1. Prepare a breakfast, set the table and serve the breakfast. It should include: juice, cooked cereal, boiled or poached egg, toast and milk. Tea or coffee for adults.
2. Prepare and pack the following in a lunch box:
a) A sandwich made with meat, poultry, fish, cheese, egg or peanut butter filling. [I guess tofu spread wasn't an option?]
b) A raw vegetable, washed and prepared, such as carrots, turnip or celery sticks.
c) A raw fruit or cooked or canned fruit in a leak-proof container.
d) Simple cookies you have made.
e) A hot drink in an insulated container.
OR
Prepare and serve, at a table or on a tray, a lunch or supper to include:
a) Hot soup, either homemade or canned.
b) A sandwich made with meat, fish, poultry, cheese, egg or vegetable filling; with a raw vegetable served on the side.
c) Canned fruit.
d) Milk, tea or coffee for adults."
I also learned from making a lot of dinners during high school (my mom often got home from work right at supper time) and from working for a chef in a camp kitchen one summer. I did NOT learn from the one year of grade 7 home ec I took.
[Oh, I forgot to say that I took a
Community Nutrition Worker course ten years ago. But that wasn't about learning to cook--it was more about budgeting and shopping, and getting people to try things like lentils.]
20. Who else would you like to participate?
Has to be somebody else with a blog, right? OK, I tag Marsha at the Abarbablog.